Tuesday, January 26, 2016
Friday, January 22, 2016
Challenge #22 for Paperbabe stamps
Hello everyone hoping you got a nice weekend Was busy crafting crafting try to get a head from my other design team OK today is challenge #22 base in sketch h ms Kim make for us this my creation be sure to go the shop to get this stamp set here the supplies i used for it
1.Herringbone stencil
2.Folk Fabrique stamp set
3.Kim Costello sentimental stamp
here the link be sure to stop by
https://www.etsy.com/uk/shop/PaperbabeStamps
be sure to visit the blog so you can enter at the challenge
click HERE
Thursday, January 21, 2016
Challenge #1 for MHK Design
Hi today I share my first challenge project for MHK designs glad to be here and be part of the team here the card i make
I added some ribbon for some sassy look
I added some glossy glue over the basket for shining
Be sure to stop n the shop here the link
Supplies use:

Wednesday, January 20, 2016
Organized your stamp!
Hi continued with the organization theme toady I share this idea very simple how to keep together that little wood stamp, I am using Stackable Cube Organizer 4 Drawer I have a few small wood stamp need some home and this the perfect solution for me i added some embellishment around this going straight on my desk here the final result hope like always you Get inspired and remember this amazing product can be find on
http://www.amazon.com/
Alicia
Tuesday, January 19, 2016
Joy Clair New Blog hop / Release Sale!!!
Welcome to the Joy Clair January Release Blog Hop! The
design team has been working hard creating a variety of projects that are sure
to spark your creativity juices! You should be arriving from the talented Cornelia's blog. If you happened to join the hop in the middle, please start at
the Joy Clair blog!
Joy Clair’s January release contains four everyday stamp
sets and four stamp sets from their new bible journalist line, Color by Faith!
All stamp sets will be on sale 25% off starting at 10:00am EST on January 19th.
The entire bundle will be available for $80.00!
Love quotes
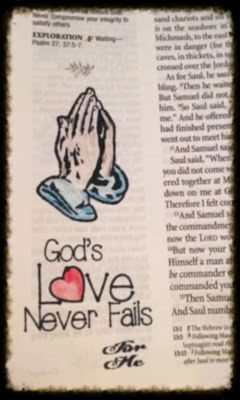
bookmark
Song of Solomon
Reservation card
Designer labels
card
God's love
Bible journalist sample
The love tree
Bible journalist sample
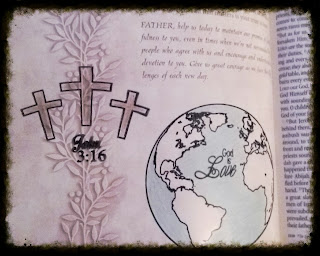
John 3:16
Bible journalist sample
Hedge Hogtastic
Funny card i make cut off the side for a kick
You and my sentiments
great card for you special love one
Now let’s talk about prizes! There will be THREE winners
from the blog hop. Each winner will receive a stamp set of their choice from
the new release! All you have to do is leave a comment on each of the blogs
throughout the hop! You have until January 22, 2016 at midnight EST. The
winners will be announced by Monday, January 25th.
Thank you for stopping my blog! Your next stop will be the
talented Steph 'sblog!
Don,t forget to stop by out site http://www.joyclair.typepad.com/blog/
so you can see all the work make by my teammate and get inspired by all the amazing
creations!!!!
stop by my teammates blogs to see all the amazing creation they been working oi it
In case you get lost along the way, here is the order for
the Joy Clair’s Blog Hop
Crystal T.- http://www.crystalthompson.net/
Martha- http://stampartpapel.com/
Jessica- http://www.kissinkrafts.blogspot.com/
Dawn- http://dipndotscreations.blogspot.com/
Cornelia- http://fun-stamping.blogspot.com/
Alicia- http://sassycardsbyalicia.blogspot.com/ (YOU HERE)
Steph- http://stephaniescraps.blogspot.com/
Monica- http://scraps2treasure.blogspot.com/
Donna- http://myblogidlet.blogspot.com/
Crystal R.- http://snapcolorpaste.com/
LeeAnn- http://mimiscraftyabyss.blogspot.com/
Monday, January 18, 2016
Second generation technique
Well
is official, January is here, which means holiday season is over. I wanted to share a card I make focus on
this holiday season as well I'm using the second generation technique
very easy to do and
after you learn it you hook
to it ,I use nice stamps set call “Lovely as a Tree” and use some amazing ink you
will love let’s get started!
By
Alicia Hill
Difficulty:
Intermediate
Time:
40
minutes plus dry time
Supplies
needed:
Radiant Neon –Electric Blue
Radiant Neon-electric Green
Kaleidacolor-rainbow dye ink
Sheer Shimmer Spray-Pewter
Radiant Neon 4 cool
Tear it-Adhesive
Other:
Stampin
up Lovely as a tree stamp set
We r memories’ trimmer /score board
Favorite
adhesive
Embossing
powder of your choice
Cardstock
white and black of your choice
Color
pencil #380 from Pentel
Memento
tuxedo black
glitter
glitter
Sponge
of your choice
directions
here is the stamp set i sue for the card
1. Here the second generation technique ,i start by stamping the image over the cardstock without re-inking the same stamp I stamped over the cardstock and that give me that second image more lighter and that is why is call the 2nd generation stamp it will added t o your card a dimension effect
2.Them I added some color sponge the top part of the card with radiant neon color I used the blue color so i have a blue sky background
3.The I did the same for the bottom part to give a illusion of green grass
4. Here I want to give a little color to the tress so I colored the tree truck wit a brown pencil
and added as well some Neon Amplify to added dimension this very easy to used just apply the amount you want in the area and apply heat (using the heat gun ) and the will active the ink to pop just like is you was embossing you can see effect in the next picture as well
5.I used the same here for the tress give the look of light bulbs on the tree when you applied the Neon Amplify pigment ink
here another view
6. this the in side of the card I use the tear-it adhesive and added some glitter over
And for my sentimental I used the Kaleidacolor so you can see the rainbow look.
This project if for http://scrapmixers.blogspot.com/ be sure to stop by and chek out al the projects there!!!
Organized with cube and frame Deflecto style!!!
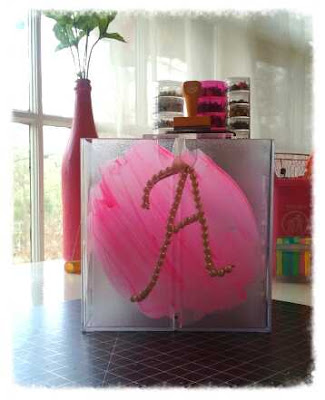
Hello today I share this amazing product to get your desk organized first project I using the Stackable-Cube-Organizer-X-Divide
to get some all my clear stamp in order ,I added some acrylic paint I do not cover the whole cube i want o give a touch of kick only and I added a old initial letter of my name i found in my draw.
Perfect for storage my clear stamps
look How a put the paint around the cube
Here I am using the Craft frame 4 x 6 , To make a sassy stand to keep my "to Do" think in order just a reminder what to do in the week
all this product can be find on http://www.amazon.com/
Friday, January 15, 2016
Pocket tag with canvas
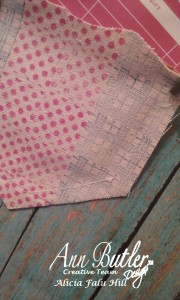
Hi everyone already a new yeas and new challenge well this month the theme on our DT is fabric so I using a piece of canvas and faux quilting from Ann Butler Faux quilting stamps to created a pocket shape tag ,very easy to to do.
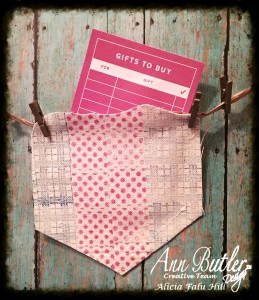
Pocket
1.make tag from cardstock (4 1/4 x 5 3/4)
2.stamp image on canvas,trim
3.cut canvas pocket to fit tag ; sew border over the tag cardstock
4.added some embellishment for decor and ribbon to hang pocket tag
Supplies need it:
cardstock
Mini clothespin from Canvas home basic
6x6 canvas
"I GOT THE BLUES"
Hello everyone today we have a blog hop (after all the hype and excitement of the holiday is all long gone and people often feel a bit flat around that time, we are giving them extra prizes.) hoping you participated you will enjoy all the great work my teammates an i make using our current sponsor be sure to stop by each blog a list below and leave the complementary January blues so you can be eligible to win some great prizes , He the card i create focus on male sponsor is Moonflowers digis stamp here my creation using Gina cup cake!
I added some glossy glue over the eyes and cake frost as well.
And added some sentimental stamp
Now be sure to visit each of the blogs so you have the change to win
let's started!!!
Here the prizes list
below
4 winners for leaving comments on each Design Team Members blog with the words "January Blues"
1st prize Gina K stamp set Spoon me 2nd prize Gina K Stamp set You make me smile
3rd prize Stampendous - Vintage Ladies
4th prize Stampendous - Charmed Art
The commenting prizes will be shipped worldwide, so everyone can enter.
Tuesday, January 12, 2016
Scrapmixers: ARE YOU READY?? SURPRISE CONTEST
Scrapmixers: ARE YOU READY?? SURPRISE CONTEST: The contest starts tomorrow. Only rule we have is that you finish at least 2 project, upload it here or somewhere else and put the links ...
Monday, January 11, 2016
Scrap Mixers: OUR DESIGNTEAM
Scrap Mixers: OUR DESIGNTEAM: Hi you all, We have selected the designteam. Thanks you for aplying. If you are not been selected, that doesn't mean that you are not...
Getting your calendar organized!!!
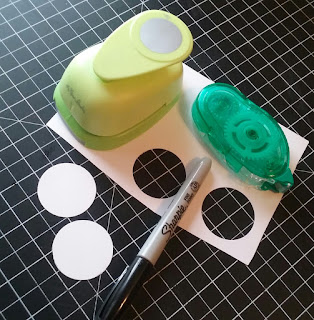
Hi Happy New Year everyone , after all the gathering with family and friends in this past Holidays it time to be organized and why not with Deflecto products today I share I all year around calendar I make using the Craft Frame 12 x12 by Deflecto very simple I use a circle punch to for the date in the calendar and the background I used a 12 x 12 pattern cardstock (of your preference) I use my own hand writing for the date on the calendar and removable adhesive so you can moved the number around thru the year here the final product hope you get inspired.
I used a versa-clip -sign holder from Deflecto as well to added a pencil to the side and some Kraft ribbon and red mesh
And remember to go to Amazon .com to find all the Deflecto products
Happy Crafting !!!
"This is a
sponsored post. As a member of the Deflecto Design Team I have been provided
product in exchange for my creative ideas, views and opinions."
Friday, January 8, 2016
Bookmark for Paperbabe Stamp
Hi Happy New Year 2016 everyone hoping your holidays when great . Today challenge over
Paperbabe Stamps is "anything goes " so I make a two bookmark since I love to read I thought the be a great gift to myself i want to keep it simple and clean (CAS) I using the Profile Face mini and Design A Tweed for this two bookmarks , very easy to do I added some glitter over the start and the small square, as well, hoping you get inspired and remember to stop by Paperbabe stamp for the challenge and visit The shop as well , here the final product.
Happy Stamping
ALICIA
Subscribe to:
Posts (Atom)


